Using the calendar
Day and week views, creating bookings, drag-to-move, blocking time off, and how buffer and processing time are visualised.
The Calendar is where you'll spend most of your day. It's a live view of every booking for your location — colour-coded, draggable, and fast.
Day view
The day view shows a single day with one column per staff member. Each booking is a coloured block spanning its start and end times.
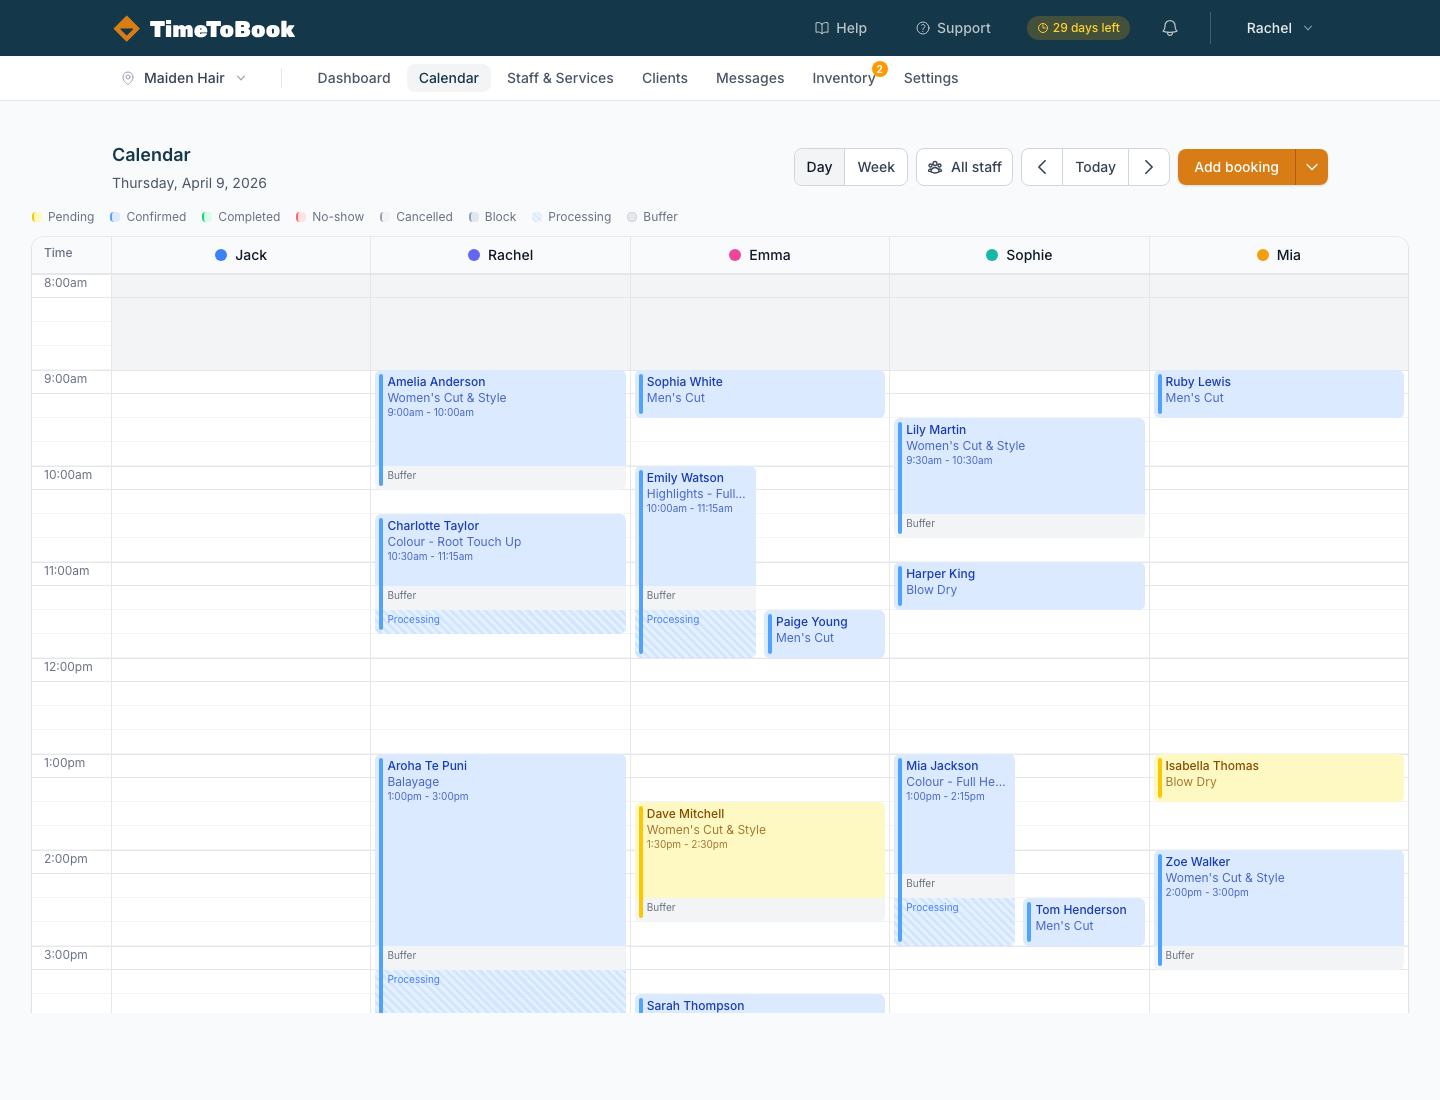
Across the top of the calendar you'll see:
- Day / Week toggle — switch between single-day and full-week views.
- Date navigation —
<and>step day-by-day (or week-by-week). Today jumps you back to today. - Add booking — create a manual booking.
Down the left side is the time axis in 15-minute increments. The calendar runs from your business opening time to your closing time, defined in Settings → Business Hours.
The status legend
Above the grid, a small legend shows what each colour means:
- Pending — booked but not yet confirmed.
- Confirmed — the default for most bookings.
- Completed — the appointment has been finished.
- No-show — the client didn't turn up.
- Cancelled — cancelled by you or the client.
- Block — time off, lunch, or any manual block.
- Processing — a hatched section showing hands-off time (e.g. colour developing).
- Buffer — time set aside after a service to clean the station.
Processing and buffer time are drawn as subtle striped blocks attached to the main booking, so you can see the "real" footprint of an appointment at a glance.
Week view
The week view shows seven days in a compressed grid. Each day is a column and each row is a staff member, with a summary of the bookings for that day. Click any day header to jump into the day view for deeper editing.
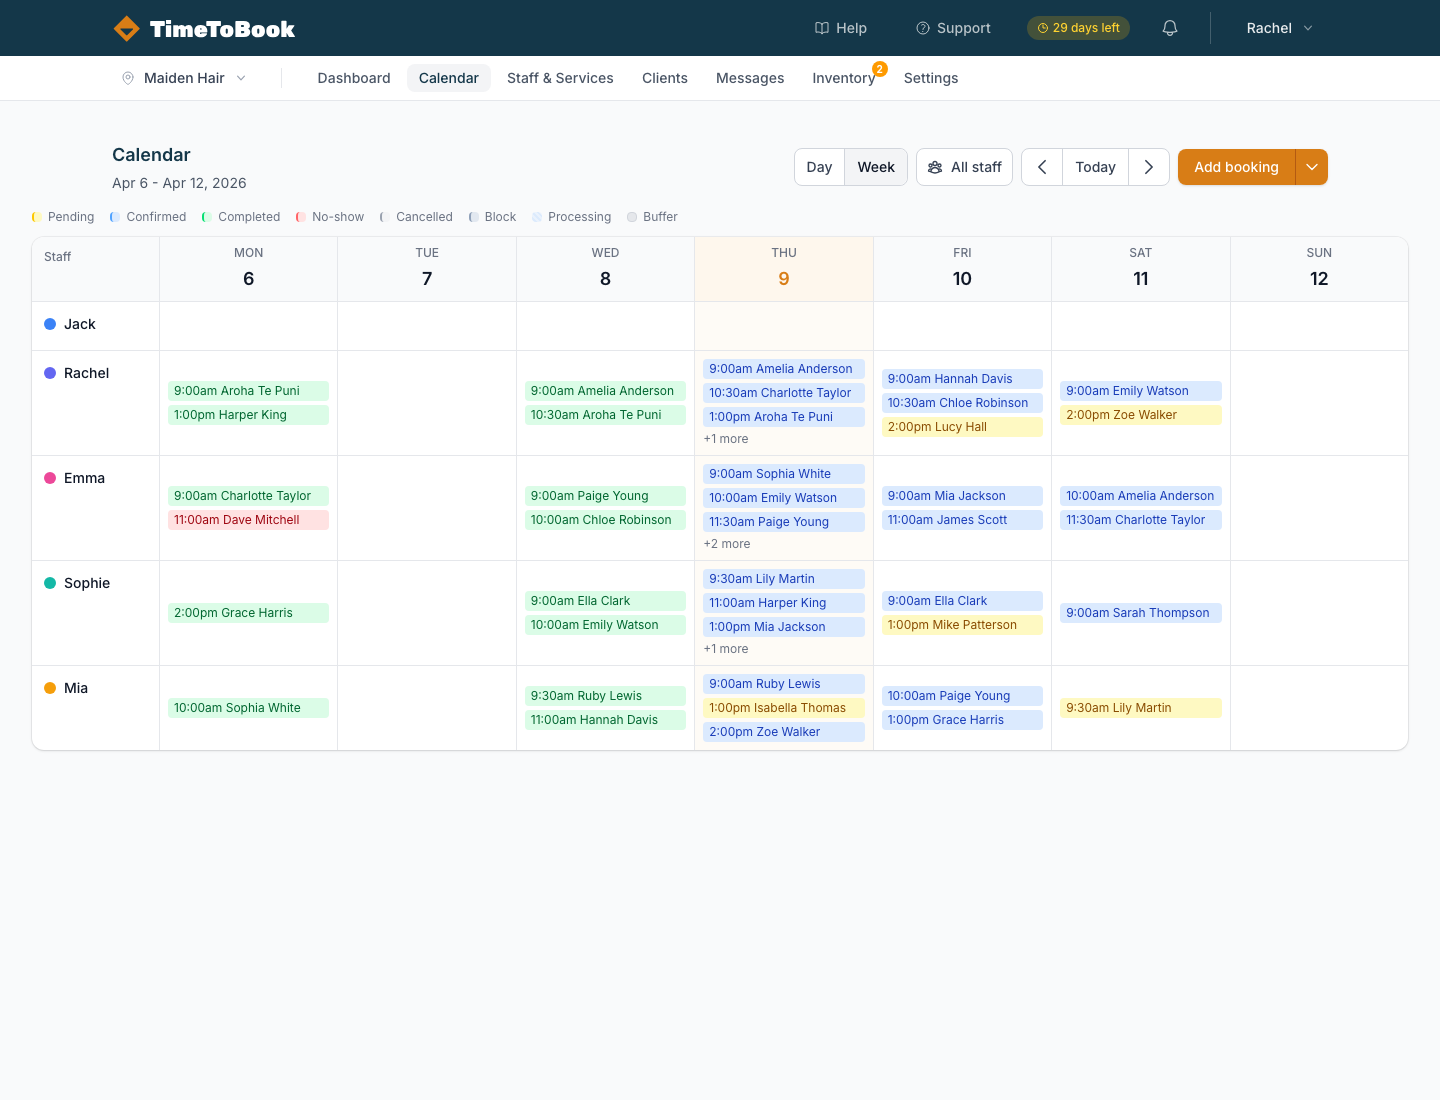
Week view is best for planning ahead and spotting quiet days. Day view is better for actually running your shift.
Creating a booking
There are three ways to create a booking:
- Click a time slot — the quickest way. Click anywhere in the empty grid and a booking modal opens, pre-filled with that time and staff member.
- Click Add booking — the button in the top right opens the same modal with no pre-fill.
- Accept one from your public page — clients create their own bookings via your booking URL.
In the booking modal you can pick a client (or create a new one on the fly), add one or more services, assign staff, and save.
Multi-service bookings
Need to book a cut and colour back-to-back? Add multiple services to a single booking. The calendar will draw them as a connected group. Processing time on the first service automatically counts toward the start of the next one — so your client's total time in the chair is accurate.
Service rows in the booking modal can also be re-ordered via the drag handle on the left of each row. This is handy if you want the colour to happen before the cut.
Moving a booking
Click and drag any booking to move it to a different time or staff member. Grouped bookings (multi-service) move together as a single unit, preserving the gaps between services. If you try to drop a booking on top of another, the calendar will warn you before saving.
Blocking time
Block time lets you reserve a chunk of a staff member's calendar for anything that isn't a client appointment — lunch, cleaning, meetings, training, or just a breather.
Creating a block
- Click Block time in the calendar header.
- Give it a title — e.g. "Lunch", "Staff meeting", "Colour class".
- Pick the staff member, date, start time, and duration (15 minutes up to 4 hours).
- Save.
The block appears on the calendar as a grey slate-coloured bar. Clients won't be offered any time slots that overlap with it on your public booking page, so it genuinely protects that time.
Recurring blocks
When creating a new block, you can set it to repeat:
- Daily (weekdays only) — Monday to Friday.
- Daily (every day) — seven days a week.
- Weekly on specific days — tick the days you want (e.g. Monday and Wednesday).
Recurring blocks can repeat forever or until a specific date.
If you need to skip a single occurrence — say you're working through lunch on a busy Saturday — open that day's block and click Skip this occurrence. The rest of the series continues as normal.
Editing and deleting blocks
Click any block on the calendar to open it. From there you can change the title, time, staff, or duration. You can also delete it entirely — you'll be asked to confirm first.
Non-recurring blocks can be dragged to a new time or staff column, just like regular bookings. Recurring blocks can't be dragged — edit them instead.
One block per staff member
Each block applies to a single staff member. If you need to block the same time for your whole team (e.g. a team meeting), create a block for each person.
Booking during another client's processing time
Processing time is "hands-off" time — the stylist isn't actively working on that client. That means you can slot a second, shorter client into someone else's processing window and get paid twice for the same hour. There are two ways to do this:
- Click the very right edge of a processing block in the calendar grid. The hatched area is clickable, and clicking inside it opens the booking modal with that time pre-filled.
- Click Add booking in the top right, then manually set the start time to fall inside the processing window. Pick a service that fits the gap.
If you try to drop a service that's longer than the available processing gap, the calendar will warn you before saving so you don't accidentally overlap the next phase of the first client's appointment.
A classic example: a full head colour with 45 minutes of developing time leaves a 45-minute window where the stylist can take a men's cut or a blow dry on the chair next door.
Still stuck?
Our support team is ready to help.